Learning how to install replacement windows can help you improve your home's comfort and replace old, drafty windows without automatically paying for professional labor. However, the job requires careful measurements, the right replacement window, and proper sealing to prevent air leaks and water damage.
The installation process depends on the type of window you choose and the condition of your existing frame. Insert replacement windows fit inside an existing frame, while full-frame replacement involves removing the old frame and preparing the opening for a completely new unit.
This guide explains how to install replacement windows, from choosing the right window to removing the old one, fitting the replacement, and checking your work. We'll focus on insert or pocket replacement windows, which allow you to keep the existing frame when it's in good condition. We'll also explain how full-frame replacement differs so you can choose the right method for your home.
Yes, you can replace some windows yourself if you have the right tools, basic carpentry skills, and a suitable installation project. Insert replacement windows are generally more manageable for DIY homeowners because the existing frame and surrounding trim can remain in place.
However, not every window replacement is a good DIY project.
You should assess the condition of the existing frame, the size and weight of the window, the height of the installation, and the manufacturer's instructions before starting.
DIY installation may be reasonable when:
Consider hiring a professional if you find rotted framing, structural damage, significant water intrusion, or an opening that needs extensive repairs. Upper-story windows can also be difficult and dangerous to replace without suitable equipment and assistance.
Older homes need extra caution. Houses built before 1978 may contain lead-based paint, which can release hazardous dust during window removal. Follow applicable lead-safe requirements and consult a qualified professional before disturbing potentially hazardous materials.
Insert Replacement Windows vs. Full-Frame Replacement Windows
Before buying a replacement window, determine which installation method suits your existing window and frame.
1. Insert or Pocket Replacement Windows
An insert replacement window fits inside the existing window frame. The old sashes and related components are removed, but the original frame and surrounding trim generally remain.
This option is worth considering when the existing frame is structurally sound and has no significant rot or water damage.
Advantages:
Limitations:
2. Full-Frame Replacement Windows
A full-frame replacement removes the existing window frame down to the surrounding rough opening. Depending on the construction, you may also need to remove interior trim, exterior trim, or portions of the siding.
This method is appropriate when the old frame is deteriorated, the opening needs repairs, or you want to change the window size or configuration.
Full-frame replacement requires more carpentry, weatherproofing, and finishing work. It is usually a more demanding project than installing an insert window.
Important: The step-by-step instructions below focus on insert replacement windows. Do not apply the same removal, flashing, or fastening procedure to a full-frame window unless the manufacturer's instructions specifically support it.
Tools and Materials Needed for DIY Window Installation
Gather your tools and materials before removing the existing window. Leaving an opening exposed while you search for supplies can create unnecessary problems, particularly in bad weather.
Tools
Materials
Not every project requires every item. The replacement window's installation instructions should determine the actual materials, fastener locations, flashing method, and sealant requirements.
Avoid using ordinary high-expansion foam around a window frame. Excessive expansion can distort the frame and interfere with the sashes.
Step 1: Measure for the Replacement Window
Accurate measurements are essential when learning how to install new windows. A replacement window that is too large may not fit into the opening, while an undersized unit may leave gaps that are difficult to seal properly.
For an insert replacement, measure the existing frame according to the window manufacturer's instructions.
Measure the Width
Measure the inside width of the existing frame at three locations:
Record all three measurements. Use the smallest measurement when determining the appropriate replacement size, subject to the manufacturer's sizing requirements.
Measure the Height
Measure the height at the left side, in the middle, and at the right side of the opening.
Record each measurement and identify the smallest one.
Check the frame carefully for unevenness, bowing, and other irregularities. Do not assume that an old window opening is perfectly square simply because the existing window still operates.
Check the Depth and Condition
The new window must fit within the available frame depth and accommodate the existing interior and exterior details.
Check the manufacturer's minimum depth requirements and confirm that the frame is suitable for the replacement unit.
Before ordering: Confirm which measurements the manufacturer requires and how much clearance the replacement window needs. Do not automatically subtract a fixed amount from every measurement; sizing rules differ by product.
For a full-frame replacement, measurements must account for the rough opening rather than simply copying the dimensions of the old window.
Step 2: Prepare the Work Area
Clear the area around the window before starting the removal process.
Move furniture and window treatments out of the way. Protect the floor and nearby furnishings from dust, paint chips, and debris.
Put on your safety equipment and arrange for another person to help if the replacement window is heavy or difficult to handle.
Check the weather forecast and avoid beginning when rain or strong winds could expose the interior to the elements. Have a suitable temporary covering ready in case the opening needs to remain exposed longer than expected.
Keep children and pets away from the work area.
Step 3: Remove the Old Window
The exact removal process depends on the window's design and whether you are working from the inside or outside. Follow the instructions for your existing window and the replacement unit.
For a typical insert replacement, the aim is to remove the existing sashes and necessary hardware while preserving the original frame.
Remove Storm Windows, If Present
If the window has a separate storm window, remove it first according to its installation method. Some units lift out, while others are secured with screws or other fasteners.
Remove the Sashes and Hardware
Open the existing window and identify the components holding the sashes in place. Depending on the design, you may need to remove sash locks, balances, stops, or other hardware.
Support the sash while releasing its fasteners. Older windows can have counterweights or spring mechanisms, so do not cut cords or release tensioned components without understanding how they work.
Remove the Necessary Stops
Stops hold the sashes in position. Some are designed to be removed and reused, while others may need replacement.
Score painted joints carefully with a utility knife before attempting to remove trim or stops. This helps reduce paint damage and splintering.
Use a suitable pry tool and work slowly. If components are embedded, brittle, or difficult to remove without damaging the frame, reassess the approach rather than forcing them out.
Inspect the Existing Frame
Once the sashes and required components are removed, inspect the frame for:
Minor surface damage may be repairable. Extensive rot or structural deterioration means the existing frame may not be suitable for an insert replacement.
Stop if you discover significant damage. You may need a full-frame replacement or professional assessment before proceeding.
Step 4: Clean and Prepare the Opening
Remove loose debris, dust, old sealant, and material that could prevent the new window from sitting properly.
Use a vacuum to clean the opening and inspect the sill, jambs, and other contact surfaces.
Repair suitable minor defects and make sure the areas intended to support the replacement window are sound.
Check that the sill is level and that the existing frame is reasonably straight and square. Use the manufacturer's instructions to determine where shims or other adjustments are required.
Do not cover signs of moisture damage with new sealant. Identify and address the underlying water problem first.
For insert replacements, the original frame remains part of the installation. For full-frame replacements, the exposed rough opening needs a different preparation and weatherproofing procedure.
Step 5: Apply the Required Flashing and Sealant
Flashing and sealing help prevent water and air from entering around a replacement window. They serve different purposes and must work with the surrounding wall's water-management system.
Follow the replacement window's installation instructions to determine where flashing tape, sealant, or other weatherproofing materials belong.
Some insert replacement installations require sealant at specific contact points between the existing frame and new unit. Others have different requirements.
Do not apply sealant indiscriminately around every edge. Blocking designed drainage paths or weep holes can trap water inside the window assembly.
For full-frame replacement, flashing must be integrated with the wall's water-resistive barrier and drainage system. The correct sequence depends on the window design and wall construction.
Allow any required preparation or curing time before moving to the next step.
Step 6: Dry-Fit the New Replacement Window
A dry fit means placing the new window in the opening before applying the final sealant or fastening it permanently.
Carefully position the window to confirm that it fits and that the required clearance remains around the frame.
Check that:
If the window does not fit, remove it and investigate the problem. Do not force an oversized unit into the opening or compensate for a fundamentally incorrect size with excessive shimming.
Follow the manufacturer's guidance on whether the unit should be installed from the interior or exterior. Some replacement windows support either approach, while others require a specific installation direction.
Step 7: Position, Shim, and Fasten the Window
Once the dry fit is successful, prepare the required sealant and flashing in the sequence specified by the manufacturer.
With assistance when necessary, position the window in the opening. Keep it supported until it is properly secured.
Position the Window
Align the replacement window with the intended stops or frame surfaces. Make sure it sits evenly rather than pressing against one side.
Install the Shims
Shims help position the frame and maintain the correct alignment while the fasteners are installed.
Place them at the locations specified by the manufacturer, particularly where the frame needs support near fastening points.
Do not place shims randomly or drive them in so tightly that they bow the frame.
Fasten the Window
Use the specified fasteners and installation holes. Drive them into the appropriate supporting material without overtightening.
Incorrect fastener placement can damage the frame or prevent the window from operating properly. Do not substitute a generic screw size or fastening pattern for the manufacturer's requirements.
At this stage, check the frame again before proceeding.
Step 8: Check That the Window Is Level, Plumb, and Square
This step is critical. A window can look straight from the outside yet still be distorted enough to cause sticking sashes, uneven gaps, or poor locking.
Use a level to check that the frame is level horizontally and plumb vertically. Check the frame for square using the method recommended by the manufacturer. Measuring diagonally between opposite corners can help identify whether a rectangular frame is out of square.
Open and close the window several times.
For double-hung windows, check that both sashes move smoothly and meet evenly when closed.
For casement windows, check that the sash opens and closes without binding and that the locking mechanism engages properly.
If the window sticks, the sash gaps are uneven, or the frame appears distorted, stop and adjust the shims or fasteners as instructed. Do not use excessive force to make the window operate.
Complete the specified fastening only after the alignment checks are satisfactory.
Step 9: Insulate the Gaps Around the Window
Once the window is properly positioned and secured, insulate the gaps between the window frame and the surrounding opening as directed by the manufacturer.
Use a compatible low-expansion window and door foam or another specified insulation material.
Apply it carefully. Filling the entire gap with excessive foam can bow the frame and interfere with the sashes.
For larger gaps, a suitable backer rod or another approved method may be required. Do not use materials that can retain water in a location where moisture needs to drain.
Insulation reduces air leakage, but it does not replace the flashing and weatherproofing needed to manage water.
Step 10: Install the Trim and Finish the Edges
Once the window is secured, aligned, and insulated as required, complete the finishing work.
Depending on the replacement window, this may involve installing an exterior sill adapter, replacing trim, or reinstalling the original stops.
Cut any protruding shims only when the installation instructions allow it and after confirming that they are no longer needed for adjustment.
Secure the trim using appropriate fasteners. Apply compatible caulk to the joints that require sealing, taking care not to cover weep holes or other drainage openings.
Interior trim may also need to be reinstalled or replaced. Finish exposed nail holes and paintable surfaces as appropriate.
Do not assume that every window requires the same sill adapter, trim arrangement, or caulking pattern. Some replacement units have integrated components that require a different finishing process.
Step 11: Test the Completed Installation
Before considering the window replacement complete, inspect the entire installation.
Check the following:
Review the manufacturer's final inspection instructions and allow sealants or other materials to cure for the specified time.
Do not deliberately spray water into joints or drainage openings as a test. If you suspect a leak, use an appropriate inspection method or consult a window professional.
How to Install Replacement Windows From Inside
Some replacement windows can be installed from the interior, but the method depends on the specific product and existing frame.
An interior installation may allow you to remove interior stops and position the new unit from inside the house. However, this does not eliminate the need for correct exterior weatherproofing.
Before beginning, confirm that the window is designed for the intended installation direction. Check the manufacturer's instructions for stop removal, sealant placement, fastening, flashing, and finishing.
If the installation requires exterior work at height, do not assume that completing the main steps from inside makes the project safe to finish without suitable access equipment.
How to Install Replacement Double-Hung Windows
Double-hung windows have two movable sashes, one above the other. When installing a replacement unit, the frame must remain correctly aligned so both sashes can move and lock properly.
The overall installation process is similar to that of other insert replacement windows, but pay particular attention to:
Test both sashes after installation. If either binds or leaves uneven gaps, check the frame alignment and shimming before completing the trim and sealing work.
How to Install Replacement Casement Windows
Casement windows open outward or inward on hinges, depending on their design. They use different operating hardware from double-hung windows, so installation and adjustment requirements may differ.
When installing a replacement casement window, confirm that the existing frame is suitable for the new unit and follow the model-specific instructions for positioning, fastening, and sealing.
After installation, check that the sash moves freely through its intended range and that the locking hardware engages without excessive force.
Do not assume that instructions for a double-hung window apply to a casement window simply because the two units fit similar openings.
How to Install Retrofit Windows
The term retrofit window is often used for replacement windows installed within an existing frame, although the exact terminology varies by manufacturer and installation method.
Retrofit installation can reduce the amount of trim and surrounding material that needs to be removed. However, it relies on the existing frame being suitable for reuse.
Inspect the frame for rot, water damage, and structural problems before choosing this approach. Confirm that the new unit is designed for the opening and that its weatherproofing details are compatible with the existing construction.
If the frame is deteriorated or the new window requires a different installation method, a full-frame replacement may be more appropriate.
Common Window Installation Mistakes to Avoid
Even a correctly sized window can perform poorly when the installation is rushed.
1. Ordering the Wrong Size
Measurements taken from only one point can miss an uneven opening. Measure at the required locations and follow the manufacturer's sizing rules before ordering.
2. Installing Over a Damaged Frame
A replacement window cannot correct underlying rot or structural damage simply by covering it. Inspect the frame before installation and address significant deterioration.
3. Overusing Shims or Fasteners
Incorrect shim placement and overtightened fasteners can distort the frame. Use the specified locations and check alignment throughout installation.
3. Using the Wrong Foam or Sealant
Materials that expand excessively or are incompatible with the window can cause damage or sealing problems. Use only suitable products and follow application instructions.
4. Blocking Drainage Openings
Some window systems have weep holes or other drainage paths. Sealing them can trap water and contribute to leaks or deterioration.
5. Skipping the Final Operation Check
Do not wait until all the trim is finished to discover that a sash sticks or the lock does not engage. Check operation before completing the finishing work.
6. Treating Insert and Full-Frame Installation as the Same Process
These methods involve different preparation, removal, and weatherproofing requirements. Choose the method based on the existing frame and the new window's instructions.
How Much Does It Cost To Install Replacement Windows
The cost to install replacement windows in the US depends on the window size, material, and installation method. A basic vinyl replacement window may cost a few hundred dollars before installation, while professionally installed replacements can cost considerably more. Replacing a single window is also much cheaper than replacing every window in your home.
1. Replacement Window Cost: DIY vs. Professional Installation
For DIY window replacement, your main expense is the window itself. You also need to budget for shims, fasteners, sealant, insulation, and any tools you do not already own.
Professional installation adds labor, removal, disposal, and finishing costs. As a broad planning benchmark, professionally installed basic vinyl replacement windows can cost around $650 per opening, although prices vary considerably.
To estimate your savings, compare the actual price of your chosen window and materials with a complete installation quote. The difference gives you a more realistic picture of what DIY installation could save.
2. What Affects Window Replacement Costs?
Window size, frame material, glass options, and the condition of the existing opening all affect the final price. Large or custom windows generally cost more than standard-sized units.
Insert replacement can also reduce costs when the existing frame is sound. Full-frame replacement may require additional removal, flashing, trim, and repairs.
3. How to Save Money on Replacement Windows
Start by inspecting the existing frame. If it is solid and undamaged, an insert replacement may help you avoid unnecessary removal and finishing work.
Measure the opening carefully before ordering, compare prices for suitable window materials, and buy the installation supplies specified by the manufacturer. This will help you build a realistic budget without paying for materials you do not need.
When Should You Hire a Professional Window Installer?
DIY window replacement is not always the cheapest or safest choice. Professional installation may be appropriate when:
Professional installation can also be useful when the window manufacturer requires specific installation procedures to maintain warranty coverage.
If you prefer to hire someone, you can explore professional window installation services through The Home Depot. Compare the scope of work, installation requirements, and total project cost before choosing a service.
Frequently Asked Questions
1. How long does it take to install a replacement window?
The time depends on the window type, the condition of the existing frame, the installation location, and the amount of finishing work. An insert replacement in a sound frame is generally less involved than a full-frame replacement. Allow additional time for preparation, repairs, and unexpected problems.
2. Can I replace windows myself without removing the frame?
Yes. Insert or pocket replacement windows are designed to fit within a suitable existing frame. The frame must be structurally sound and compatible with the new window. If it is rotted or significantly damaged, full-frame replacement may be necessary.
3. Can replacement windows be installed from the inside?
Some can. The installation direction depends on the window model, frame design, and manufacturer's instructions. Interior installation still requires appropriate exterior weatherproofing and safe access for any necessary outside work.
4. Do replacement windows need flashing?
Flashing requirements depend on the window design and installation method. Follow the manufacturer's instructions and the applicable building requirements to ensure the installation manages water correctly. Flashing is especially important when the installation involves the rough opening and surrounding wall system.
5. How to properly measure for new replacement windows?
To measure for replacement windows, use a tape measure to find the width of the window opening at the top, middle, and bottom, then do the same for the height on the left, center, and right. Use the smallest number in each direction, and also check the frame depth to make sure the new window will fit. Measure every window separately, and round down to the nearest 1/8 inch for the most accurate fit.
6. Should I use spray foam around replacement windows?
Use only foam specifically suitable for window and door applications, and only where the manufacturer's instructions allow it. Excessive expansion can distort the frame. Foam also does not replace the flashing and sealing needed to manage water.
7. Is insert replacement better than full-frame replacement?
Neither method is always better. Insert replacement can be appropriate when the existing frame is in good condition and you want to preserve the surrounding trim. Full-frame replacement is more appropriate when the existing frame is damaged, the opening needs repairs, or the window size or configuration is changing.
8. Can I install a replacement window without professional help?
You may be able to install a suitable insert replacement window if you have the necessary tools, skills, and safe access. Extensive frame damage, structural changes, hazardous old paint, or difficult upper-story work may require professional assistance.
Final Thoughts
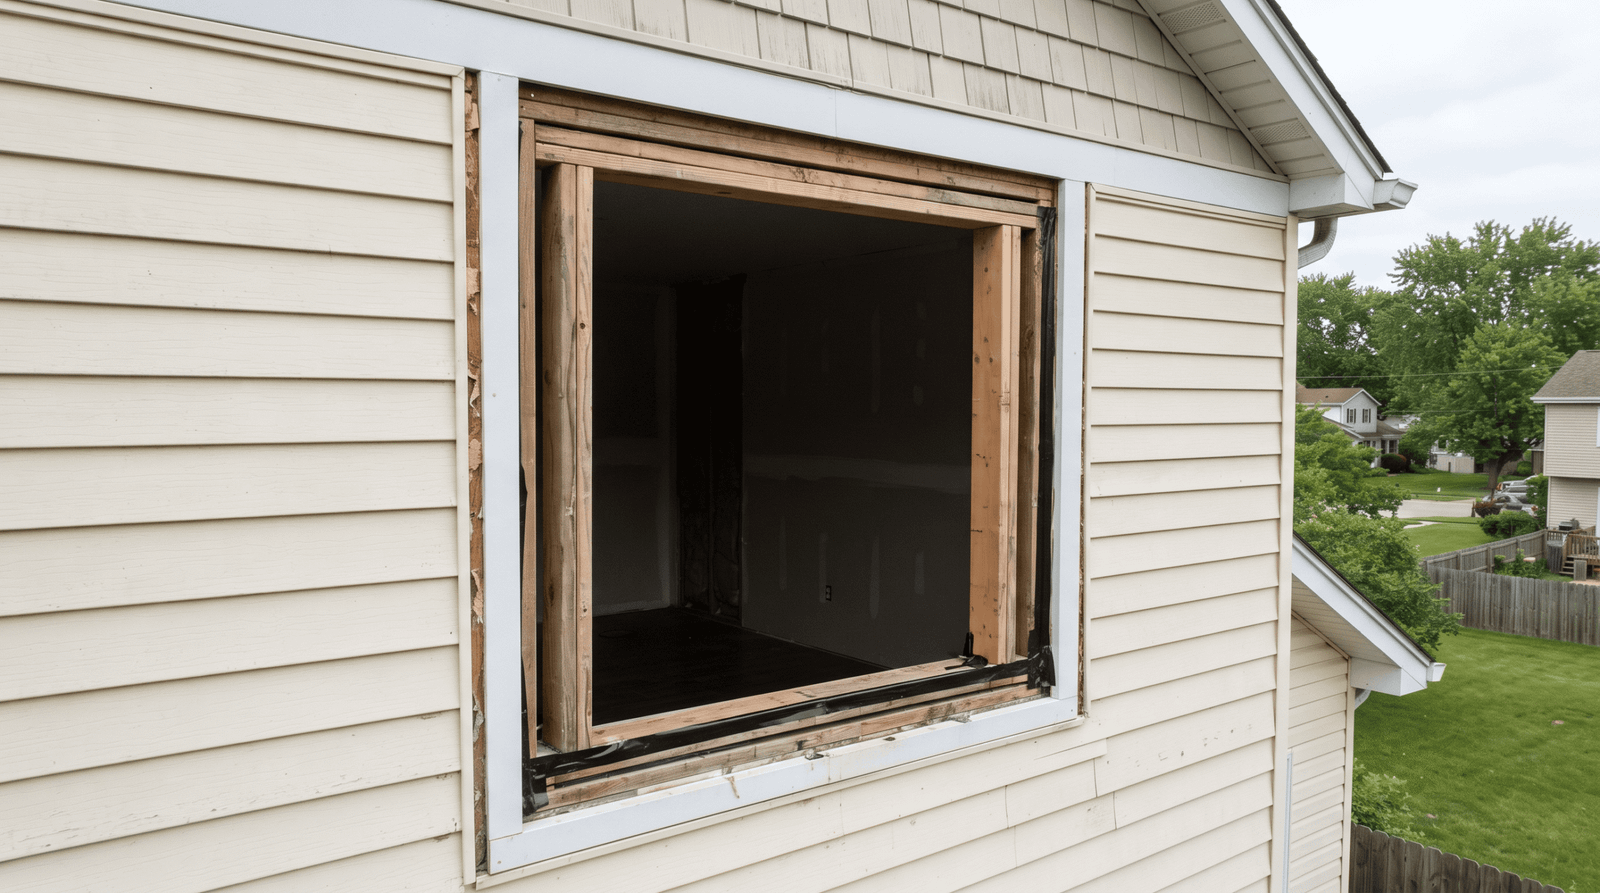
Learning how to install replacement windows starts with choosing the right window and measuring the opening accurately. From there, careful preparation, correct positioning, proper shimming, and thorough sealing help ensure the new window fits and operates as intended.
Take your time with each step, especially when checking that the frame is level, plumb, and square. These details affect how smoothly the window opens, closes, and locks. Follow the manufacturer's installation instructions throughout the process, since fastening, flashing, and sealing requirements can vary by window model.
With the right materials and a methodical approach, you can replace a suitable existing window and give your home a better-fitting, properly installed unit.